HLS® 9000 Stainless Steel Handle Set Installation Instructions

To watch these instructions in a video, click here.
A Phillips screwdriver is required. A soft, damp cloth is recommended for cleaning. Cleaning products specifically formulated for stainless steel may also be used.
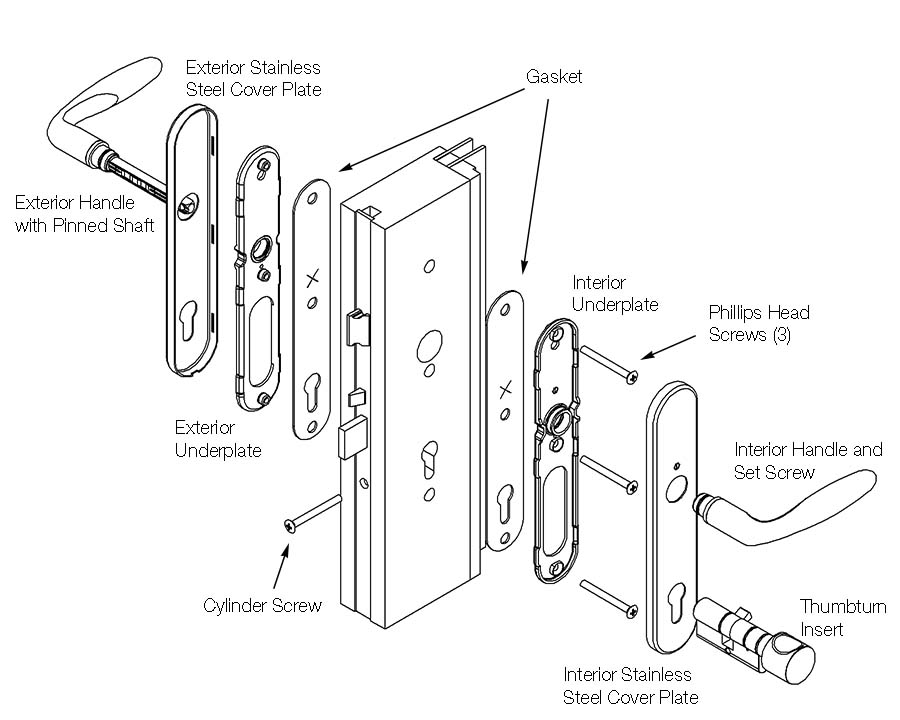
- Apply gaskets and underplates to door as shown, and fasten loosely with the Phillips head screws provided.
NOTE: The interior underplate has holes for screws, and the exterior underplate has threaded posts.
- Firmly press the handle with pinned shaft into the exterior underplate. The shaft sohuld extend through the door gear and out the interior side of the door.
- Slide remaining handle over the shaft, pressing it tightly into the interior underplate.
- Tighten the underplate screws.
- Press the handles together and install with the set screw on the interior side using the hex wrench provided. Firmly tighten set screw. To ensure proper installation, tighten set screw to 40-50 in-lbs.
NOTE: Threadlocker may be used on set screw (Loctite Blue # 242 Threadlocker).
- Carefully slide the stainless steel cover plates over the handles and snap them onto the underplates.
IMPORTANT: For Inactive Sets, a cover plate with a Thumbturn/Cylinder hole must be installed on the interior side of the door.
- Install the thumbturn insert from the interior side and secure using the cylinder screw provided. Further instructions for 90º turn inserts are included in the packaging.