HLS® 9000 Swing Door Standard Handle Set with Bunas Installation Instructions

To watch a video of these instructions, click here.
A Phillips screwdriver is required.
A Hex wrench for set screws is provided in the hardware package.
To prevent damage to the handle set while in construction phase, use the enclosed construction handle to operate the door. Lift to engage multipoint to close door. Push down to open the door.
Use water to clean. Do not use brass cleaner as it will remove the protective coating.
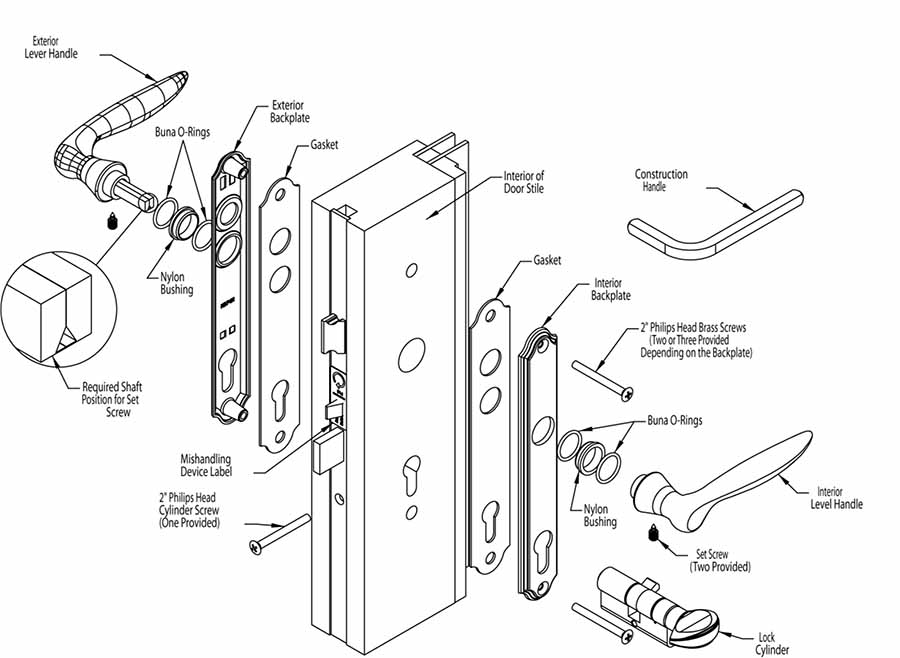
Note: Handles and backplates vary by style but application is the same.
- Position one o-ring over the nylon bushing and place it in the hole of the backplate. The other o-ring should be placed over the handle.
- Apply the backplate gasket to the inside of the exterior backplate. Push gasket firmly onto place to ensure a tight seal. Apply the backplate gasket to the inside of the interior backplate. Apply interior and exterior backplates and fasten loosely with the two screws provided. Note: The screw heads must be on the interior side of the door.
- Insert the two piece handle shaft into the handle. Be sure to orient the shaft as shown below. Screw the setscrew until flush with handle using the allen wrench. Insert the handle into the latch hole.
- Install the interior handle on the shaft through the latch hole, pressing tightly to the backplates. Tighten the interior handle set screw with allen wrench. Screw until flush with handle.
- Insert the keyed cylinder from the interior side of the door until it is flush with the exterior backplate. Install the cylinder screw in the screw hole below the deadbolt in the edge of the door.
- Tighten the backplate screws.
- Remove the mishandling device label and shipping clip only after the door is installed and operable.