HLS® 9000 Aluminum Fixed Dummy Trim Set Installation Instructions

To watch these instructions in a video, click here.
A Phillips screwdriver is required. A hex wrench for set screws is provided in the hardware package.
Use water and a soft cloth to clean. Do not use solvent based cleaning agents.
Note:
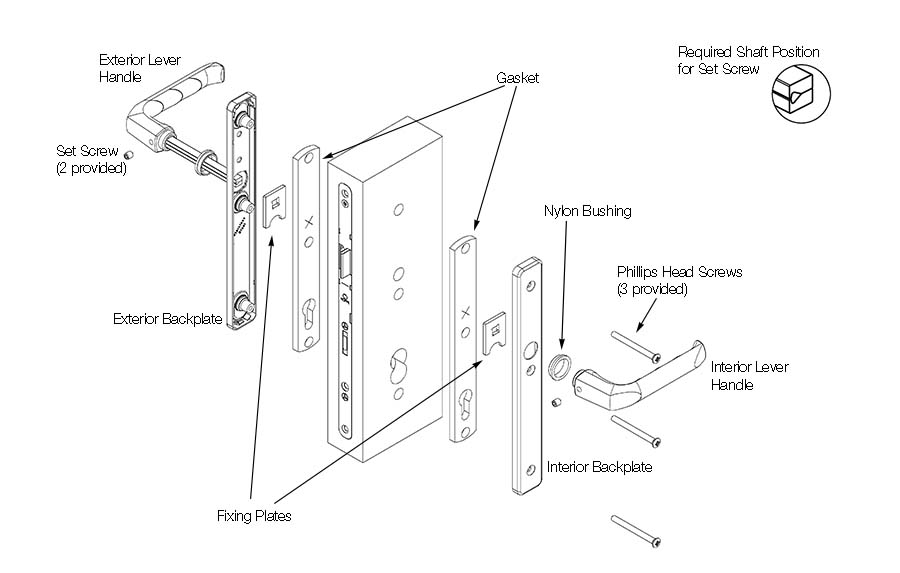
Handles and backplates vary by style but application is the same.
- From the underside of each backplate, press firmly on the existing nylon bushing to remove it. Replace with bushings supplied in the handle set parts pack.
- Place one fixing plate on the underside of each backplate. Position as shown, so that the arch in the plate it is seated against the middle screw lug.
- Attach interior and exterior backplates to the door and fasten loosely with the screws provided.
Note:
The screw heads must be on the interior side of the door.
- Install the two-piece handle shaft into one handle. Be sure to orient the shaft as shown below. Insert and tighten the set screw until flush with the handle using the hex wrench provided.
- Insert the handle with shaft attached through the backplate handle hole and fixing plate until extending out opposite side of door.
- Install remaining handle onto shaft, pressing tightly to the backplates. Tighten the handle set screw with hex wrench. Screw until flush with handle.
- Hand tighten the backplate screws to complete assembly.